Fix: Cannot Remove Drive Letter from Recovery or System Partition (Windows 10/11)
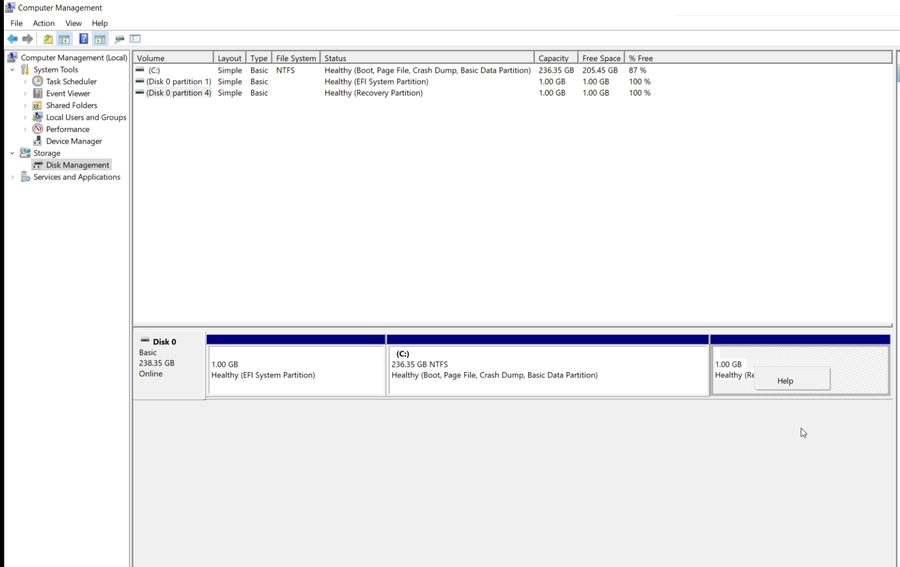
Problem: After cloning a disk or restoring a system image, Windows may assign drive letters to Recovery, EFI System, or other protected partitions. In Disk Management, the option to remove the drive letter is often greyed out.
Fix: This guide shows the exact working method using the Windows registry to safely remove unwanted drive letters and restore partitions to their hidden state.
Symptoms
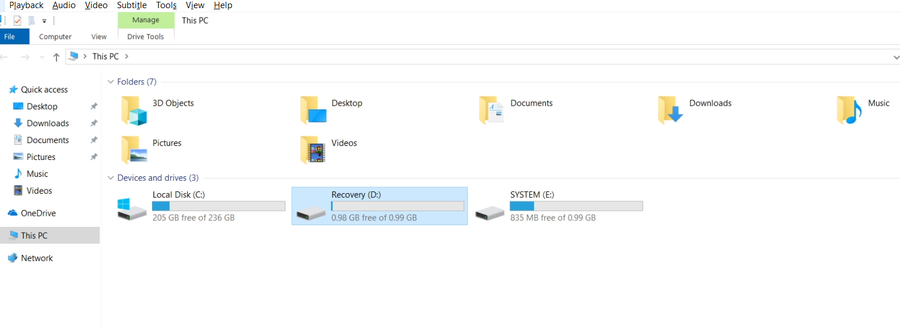
- Recovery partition shows a drive letter (e.g., D:)
- EFI System partition shows a drive letter (e.g., E:)
- Disk Management cannot remove or change the drive letter
- Only “Help” appears in right-click menu
Why This Happens After Cloning or Restore
Normally, Windows System (EFI) and Recovery partitions do not have drive letters. They are hidden to protect critical boot and recovery files.
However, after a disk clone, backup restore, or system migration, these partitions may appear with drive letters.
Root Cause
Windows stores drive letter assignments in the registry:
HKEY_LOCAL_MACHINE\SYSTEM\MountedDevicesDuring cloning or restore:
- Disk signature or partition GUID may change
- Windows detects partitions as new volumes
- Automatic drive letter assignment is triggered
- Old mappings no longer match correctly
As a result, Windows assigns drive letters to partitions that should remain hidden.
---Why You Should Fix It
- Prevents accidental deletion of boot files
- Avoids issues with Windows Update or recovery
- Keeps system clean and professional
- Improves backup accuracy
Fix: Remove Drive Letter Using Registry (Working Solution)
Since Disk Management cannot remove the drive letter, follow these steps.
---Step 1: Open Registry Editor
Press Win + R, type regedit, and press Enter.
Navigate to:
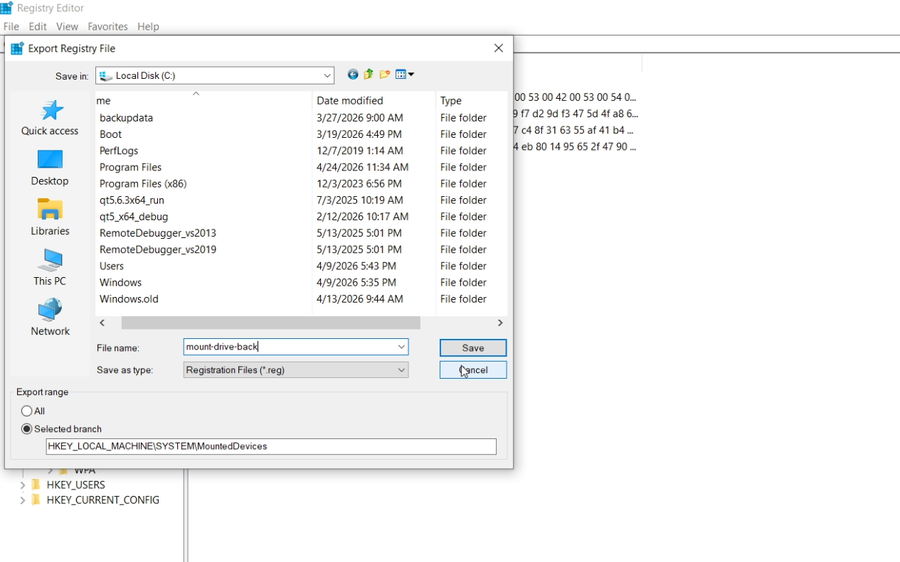
HKEY_LOCAL_MACHINE\SYSTEM\MountedDevicesStep 2: Back Up the Registry Key
Right-click MountedDevices → Export.
Step 3: Find the Drive Letter Mapping
Look for entries like:
\DosDevices\D:
\DosDevices\E: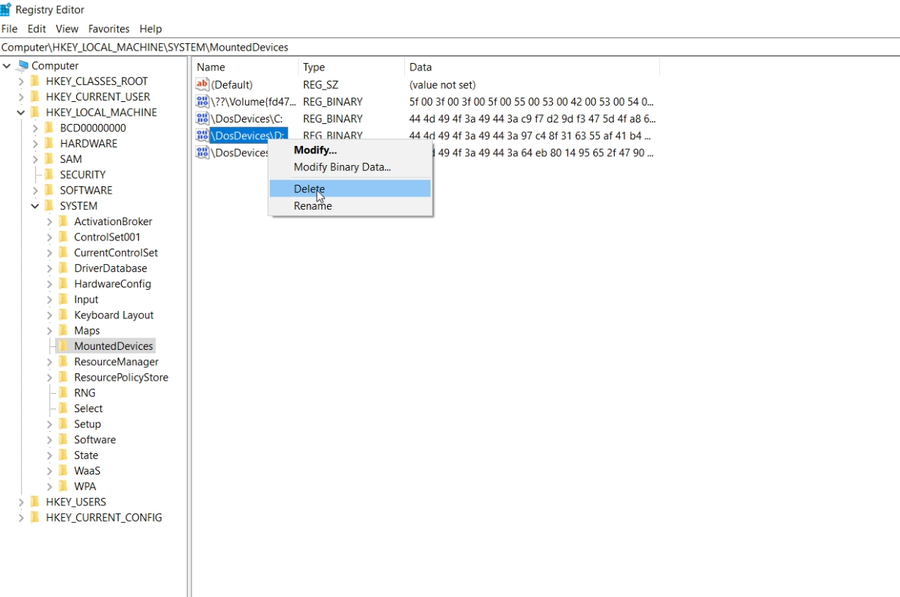
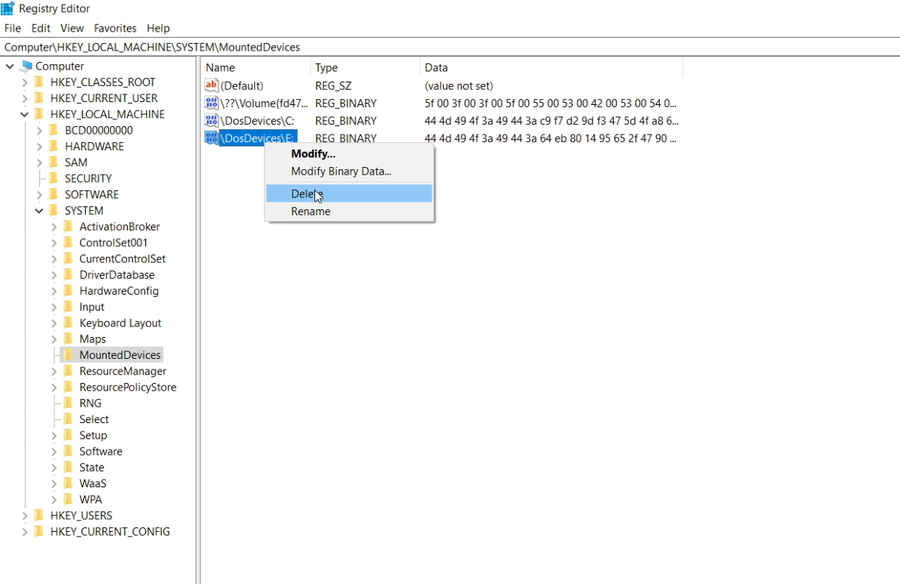
Step 4: Delete the Mapping
Right-click the correct entry → Delete.
Step 5: Restart the Computer
Reboot Windows to apply changes.
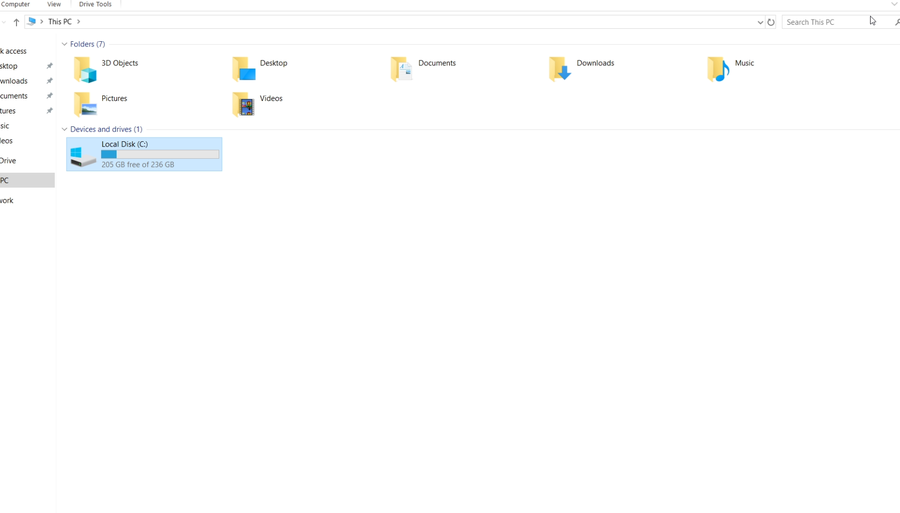
---Result
After reboot:
- Recovery partition has no drive letter
- System partition is hidden again
- Disk layout returns to normal
Alternative Solution (Easier Method)
Instead of editing the registry manually, you can use professional tools like Lazesoft Recovery Suite to manage partitions safely.
- Delete or hide partitions easily
- No risk of registry mistakes
- Works in Windows or bootable environment
Common Questions
Can I delete the recovery partition instead?
No. It is recommended to keep it for system recovery.
Will this affect boot?
No, as long as you only remove the drive letter mapping.
Why does this happen after cloning?
Because Windows reassigns drive letters when disk IDs or GUIDs change.
---Summary
If you cannot remove a drive letter from a recovery or system partition:
- Back up MountedDevices registry key
- Delete the corresponding \DosDevices entry
- Restart Windows
This is the most reliable way to fix the issue when Disk Management fails.
---