How to clone entire disk for backup or upgrading
Sooner or later, you might find that your hard disk does not have enough space for the operating system and installed applications. In this case, you have to transfer the system to a larger hard disk.
In order to prevent data loss due to system failure and program error, make a copy of all the data, including partitions, folders and files, to another disk for backup is a good choice.
Lazesoft Disk Image & Clone provides users a easy, safe and fast method, disk clone, to create an exact copy of every single bit on the old hard drive
Launch Lazesoft Disk Image & Clone and click <Clone Disk> to start a disk copy wizard.
How to clone a disk step by step
1.Selecting source disk and disk copy method
If the program finds several partitioned disks, it will ask you which is the source.
You can determine the source and destination using the provided information in this page such as disk capacity, label, partitions information, etc.
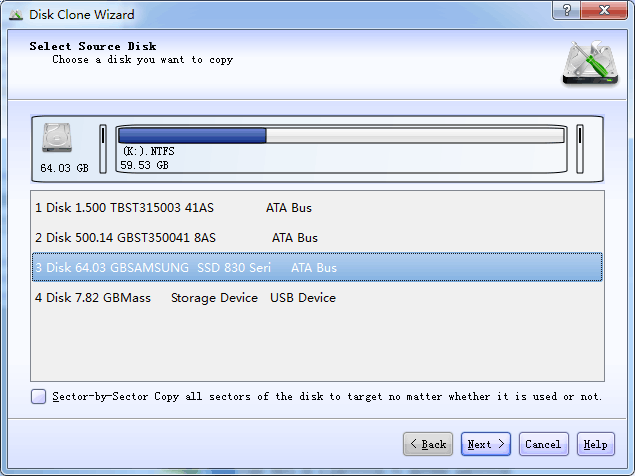
Copy Options on this page
Important: double-check the source selection. In later steps, the destination disk will be overwritten.
Sector-by-Sector Copy
What it does: copies every sector from the source disk, including unused (empty) space—an exact, bit‑for‑bit duplicate.
- Use it when: you need a perfectly identical clone (forensics/data recovery), the source has special/unknown layouts, or you suspect hidden data you must preserve.
- Pros: nothing is skipped.
- Cons: slower because it also copies empty space; the destination must be at least as large as the source.
Specify Partitions to Copy
What it does: lets you select specific partitions instead of copying the entire disk.
- Use it when: you only need certain partitions (for example, migrating just Windows) and you understand which system/recovery partitions are required.
- Pros: faster and more flexible; often copies only used data.
- Cons: if you exclude a required system/EFI/recovery partition, the cloned disk may not boot.
Tip: Sector‑by‑sector requires the target disk size to be ≥ the source disk. If you are resizing or selecting partitions, a smaller target may work only when the used data fits.
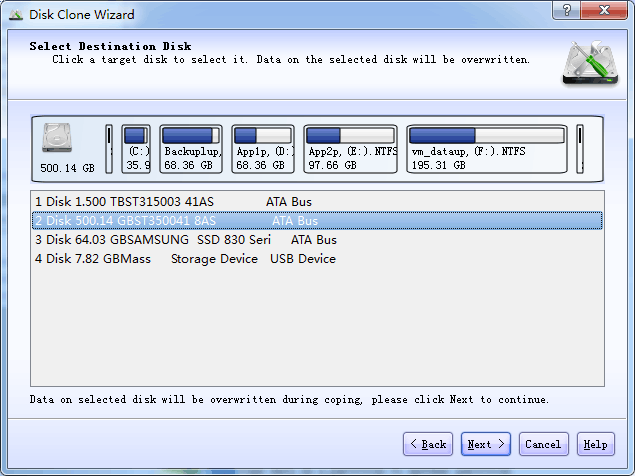
2.Selecting destination disk
After you select the source disk, you have to select the destination where the disk information will be copied.
3. Choosing how partitions will be laid out on the destination disk (Edit Disk)
On the Edit Disk page, you decide whether Lazesoft should resize partitions during the clone. This is important when the destination disk is larger (or smaller) than the source.
Copy Options
Copy without resizing partitions
What it does: copies partitions with the same sizes as the source disk. Any extra space on a larger destination disk will remain unallocated (you can extend/create partitions later).
- Use it when: you want the safest “no layout changes” clone or you plan to manage the extra space manually.
- Pros: minimal changes, predictable results.
- Cons: may leave a lot of unused space on larger disks until you extend partitions.
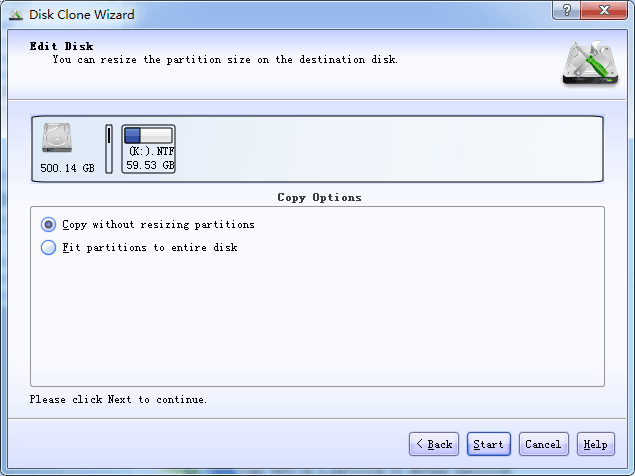
Fit partitions to entire disk
What it does: automatically expands (or shrinks) partitions to use the full capacity of the destination disk. This is usually the best choice when upgrading to a larger disk.
- Use it when: migrating to a bigger SSD/HDD and you want the new disk ready to use at full capacity immediately.
- Tip: use the preview bar to confirm the “after” sizes look reasonable before continuing.

Shrink partitions size on target disk
What it does: reduces partitions by trimming unused space so the data can fit onto a smaller destination disk.
- Use it when: cloning to a smaller disk (only possible if the used data fits).
- Note: shrinking requires sufficient free space inside the partition; avoid this option unless you specifically need it.
Disk signature option (recommended to keep checked in most cases)
Create a disk signature of your target disk that differs from the signature of your source disk
- When checked (default): the destination disk gets a new unique ID. This helps prevent Windows from detecting “duplicate disks” if both disks are connected at the same time.
- When you might uncheck it: if you are doing a straight replacement (you will remove the old disk immediately after cloning) and you want the destination to remain as identical as possible for boot compatibility.
- Heads-up: if you keep the same signature and later connect both disks together, Windows may mark one disk as Offline to avoid conflicts.
4.Start Copying
To start copying, click Start. A waring message will be prompted, please pay attention to it.
After you click Start, Lazesoft Disk Image & Clone will start cloning the old disk to the new disk, indicating the progress in the special window. You can stop this procedure by clicking Cancel. In that case, you will have to repartition and format the new disk or repeat the cloning procedure. After the operation is complete, you will see the results message.
Lazesoft Recovery Suite is easy to use, powerful boot disk design to Recover Data, Recover crashed Windows System, Recover Windows Password, Clone or Backup Disk, etc.
Recovery manual and guides
How to burn a bootable recovery CD
How to boot from the created recovery CD
How to create a bootable recovery USB Disk and boot from it
How to perform a data recovery
How to recover data from formatted or damaged partition
How to fix boot problems if Windows won't start correctly
How to clone entire disk for backup or upgrading
How to recover Windows login password
How to recover Windows Server password
Forgot Windows admin user password
Forgot Windows Server 2003 2008 Domain Administrator Password
How to burn a Windows password recovery CD
How to boot Windows password recovery CD
How to recover Windows login password
How to recover administrator password
How to recover Windows Server password
How to recover Windows XP password
How to recover Windows Vista password
More...