Windows 10 / Windows 11 Recovery USB Disk
On modern PCs, Windows 10 and Windows 11 usually come pre-installed, and many computers no longer include a Windows installation DVD. That is why it is very important to prepare a Recovery USB disk in advance. When your PC cannot boot, shows a black screen, keeps restarting, or Windows startup repair fails, a recovery USB disk can help you:
- Boot the computer when Windows cannot start
- Access recovery options (Startup Repair, System Restore, Command Prompt, etc.)
- Restore Windows from a system image or reset Windows
- Backup / recover important files from an unbootable computer
- Fix boot problems (BCD/boot sector/boot files), and more
In this guide, we introduce three practical ways to create recovery media for Windows 10/11:
- Method 1: Build a powerful bootable recovery USB using Lazesoft Recovery Suite
- Method 2: Use Windows built-in Create a recovery drive tool (Windows Recovery Drive)
- Method 3: Create a Windows installation USB (for reinstall/repair) using Microsoft media tools
Important notes before you start:
- The USB flash drive will be formatted. Please backup files from the USB first.
- Recovery media is typically architecture-specific (32-bit vs 64-bit). In most cases, create the recovery USB on a PC that matches the Windows architecture you want to repair.
- On UEFI computers, you may need to boot the USB in UEFI mode. Some PCs also require temporarily adjusting Secure Boot or boot order settings in BIOS/UEFI.
Method 1: Create a Windows 10/11 recovery USB using Lazesoft Recovery Suite
Using Lazesoft Recovery Suite, you can easily build a bootable recovery CD/DVD or USB flash disk based on Microsoft WinPE environment. The boot disk created by Lazesoft is a professional ALL-IN-ONE recovery toolkit designed to help you:
- Repair Windows boot problems and recover crashed Windows
- Recover lost data from deleted/formatted/damaged partitions
- Reset forgotten Windows passwords
- Clone disks / backup disks / manage partitions
Steps to build a bootable recovery USB with Lazesoft (Windows 10/11)
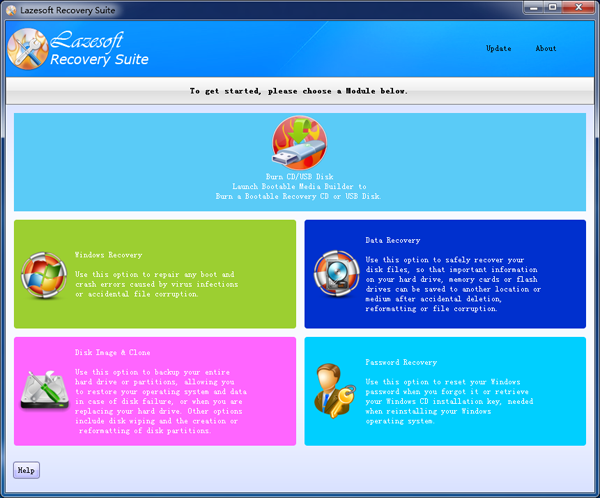
1. Download and install Lazesoft Recovery Suite, then launch it.
2. Click "Burn CD/USB Disk" from the home page, the Lazesoft Media Builder runs automatically.
3. Insert your USB flash drive into the computer. (Backup important files from the USB first.)
4. From the welcome page, click <Next> to continue.
5. Choose USB disk and select the inserted USB flash drive, then click <Start> to begin building the recovery USB.
6. Please wait until the building process is finished. When completed, click <Next> to enter the finish page.
Now your Windows 10/11 bootable recovery USB disk is ready. You can boot your PC from this USB to repair Windows boot issues, rescue files, reset passwords, and more.
Method 2: Create a Windows Recovery Drive using Windows built-in tool
Windows 10 and Windows 11 include a built-in tool called Create a recovery drive. This creates a USB that boots into Windows Recovery Environment (WinRE), where you can access tools such as Startup Repair, System Restore, Command Prompt, and Reset this PC.
How to create a Recovery Drive (Windows 10/11)
- Connect a USB flash drive (at least 8GB is recommended, more may be required if you include system files).
- In Windows, open Start menu search and type: recovery drive.
- Click Create a recovery drive. If prompted by UAC, click Yes.
- In the wizard, you may see an option like Back up system files to the recovery drive. Enable it if you want a more complete recovery USB.
- Select your USB drive, click Next, then click Create.
- Wait until the process completes. Windows will format the USB and copy the recovery files.
Tip: The Windows Recovery Drive is useful, but it mainly contains Microsoft recovery tools. If you want an ALL-IN-ONE disk that also includes data recovery, password reset, disk clone/image, and partition tools, we recommend using Lazesoft Recovery Suite.
Method 3: Create a Windows 10/11 Installation USB (for reinstall or repair)
Besides a Recovery Drive, many users also prepare a Windows installation USB. An installation USB can help you reinstall Windows, or boot into Windows Setup to access repair options on the "Repair your computer" screen.
- This method is recommended if Windows is severely damaged and you need to reinstall.
- If you only want to repair boot issues or rescue files, Method 1 (Lazesoft) is often faster and more convenient.
To create an installation USB, you can download the official Windows installation media tool from Microsoft, then follow the wizard to create a bootable USB drive. After that, boot from the USB and choose Repair your computer (or reinstall Windows if required).
After creating the USB: how to boot from the recovery USB disk
After you have created the recovery USB disk, you need to boot your computer from it:
- Insert the USB into the problem computer.
- Restart the PC and enter the boot menu (common keys: F12, F11, Esc, F9, Del – depends on brand/model).
- Select the USB device to boot. On UEFI PCs, you may see two options; choose the one starting with UEFI: for UEFI boot.
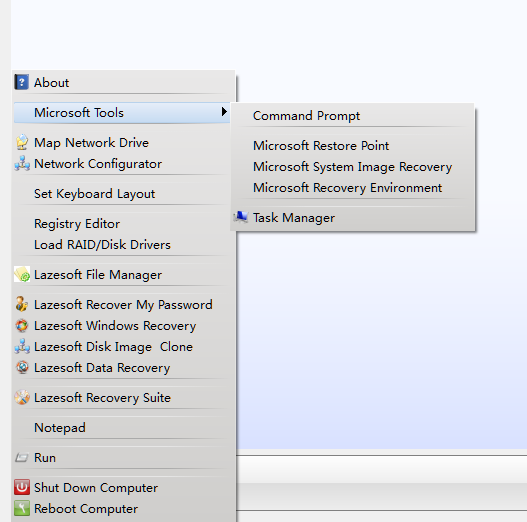
- Once booted, choose the repair tools you need (Lazesoft Recovery Suite tools or Windows recovery options).
Preparing a Windows 10/11 recovery USB disk is one of the best ways to protect yourself from boot failures, blue/black screens, and unexpected system crashes. With Lazesoft Recovery Suite, you can build a powerful all-in-one recovery USB that helps you repair Windows, recover data, reset passwords, clone disks and more.
Lazesoft Recovery Suite is easy to use, powerful boot disk design to Recover Data, Recover crashed Windows System, Recover Windows Password, Clone or Backup Disk, etc.
Free Windows recovery manual
build a Windows 7 USB System Repair Disc
Fix Error 0xc000000f - BCD Missing
Fix a damaged MBR for Windows XP
Fix a Windows XP Loading Crash
Fix 'Operating system not found'
fix Windows Server 2008 BOOTMGR is missing Error
fix the 'Hal.dll is Missing' error
Start Menu on Lazesoft boot disk
Build Windows 7 System Repair Disc
Build Windows 8 recovery USB disk